Contents
NOTE: In accordance with GA Tech’s Honor Code, I’ll be obfuscating and redacting specific details of this project for prevention of plagiarism.
Overview
The following project, from my Network Security course, is a deep dive into malware analysis. I was tasked with analyzing three real malware samples taken from the wild (Windows, Linux, and Android), recreating the Command and Control (C2) servers, and discovering and tracing the malwares’ behavior.
Malware behavior was traced with:
- Static Analysis:
- Manual Reverse Engineering
- Programming binary analysis
- Dynamic Analysis:
- Network behavioral tracing
- Run-time system behavioral tracing (File/Process/Thread/Registry)
- Symbolic execution
- Fuzzing
Objectives
- Find which server controls the malware (The C2 server).
- Discover how the malware communicates with the C2 server.
- URL and Payload
- Discover what activities are done by the Linux Malware.
- Attack activities
Requirements
- Ensure no malware traffic goes out from the virtual machine (VM).
- The C2 server is dead: I need to reconstruct it.
- Using the tools provided to reconstruct the server, then revealing the hidden behaviors of the malware.
- Analyze network traffic on the host, figuring out the list of available commands for the malware, and figuring out what the malware does.
Project Structure
-
Virtualbox for the initial Virtual Machine (VM)
- Ubuntu 16.04 LTS VM
- Virtual Machine Manager within Ubuntu VM
- Windows XP SP3 VM [sandbox VM where I deploy the malware]
- Virtual Machine Manager within Ubuntu VM
- Ubuntu 16.04 LTS VM
-
Network Configurations
- tap0
- Virtual network interface for Windows XP
- br0
- Network bridge between Windows XP and Ubuntu
- enp0s3
- Network that faces the Internet
- tap0
-
The Ubuntu VM contains various files and directories that help set up and guide the project, in addition to tools that will be used for analysis.
-
Tools:
- Network
- configuration of my network firewall rules with iptables.
- allow/disallow/redirect the traffic from the malware.
- configuration of my network firewall rules with iptables.
- cfg-generation (CFG == Control-Flow Graph)
- Analysis tool that aids in finding interesting functions of malicious activity.
- sym-exec
- Symbolic Executor based on angr
- Aids in figuring out the commands that the malware expects.
- Symbolic Executor based on angr
- c2-command
- Simplified tool for C2 server reconstruction.
- Randomly chooses one command at a time to send to the malware.
- Network
-
Malware:
- stage1.exe - Stage 1 Malware
- It will download Stage 2 malware if this malware receives the correct command.
- stage2.exe - Stage 2 Malware
- It will download stage 3 malware if this malware receives the correct command.
- payload.exe - Linux Malware Attack Payload
- Analyze the dynamic instruction trace.
- Write a script to detect where the C2 communication happens - find the loop entry point and function sequence in the loop.
- Add constraint to the symbolic execution to limit the loop to one.
- Find the feasible attacks within the given set of possible attacks.
- stage1.exe - Stage 1 Malware
Project Start
Malware Stage 1 - Windows
Stages 1 and 2 of this project were not incredibly difficult for me. The most challenging part of these stages were finding the correct IP addresses for the questions I had to answer throughout the project, which served as checkpoints, ensuring the information gathered was correct.
I downloaded the stage1.exe malware in the Ubuntu VM (hereinafter ubuntu), and then shared it to the Windows XP VM (hereinafter windows). The malware was then moved to the windows Desktop and then executed.

Once executed, I realized the malware did not perform any noticeable behavior. This is because the C2 server is dead. I had to recreate the malware’s C2 server in order to unfold the malware behavior.
Network Monitoring
Since there was no noticeable behavior, my next step was to monitor the network traffic, which I did with Wireshark. With the bridge network br0 selected in ubuntu, and the malware running in windows, I started the Wireshark capture. I noticed that the malware attempted to connect to the host at 128.61.249.66 through TCP, but failed.

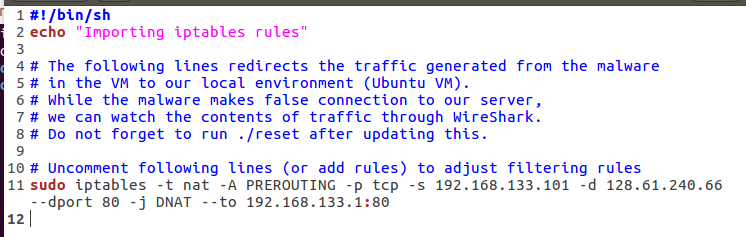
Network Redirection
With the IP above, I then configured the ip-tables file to redirect the malware to my own fake C2 server, applying the changes and checking back in with Wireshark.
C2 Traffic
Back in Wireshark, I noticed that the malware was now able to communicate with my fake C2 server. The malware did not progress further, as the command from my C2 server was currently incorrect.

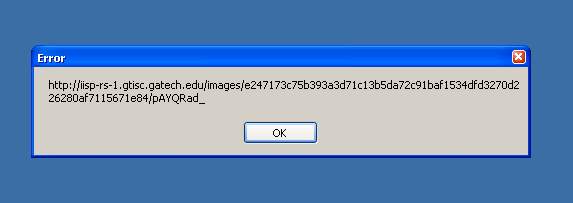
Although the malware behavior did not progress, I noticed a POST request in the traffic, which I followed in Wireshark as a TCP Stream, resulting in interesting data:

Of note are the Host URL and the Cookie in the POST header: I found where the malware was hosted, and also how the C2 server issued its commands.
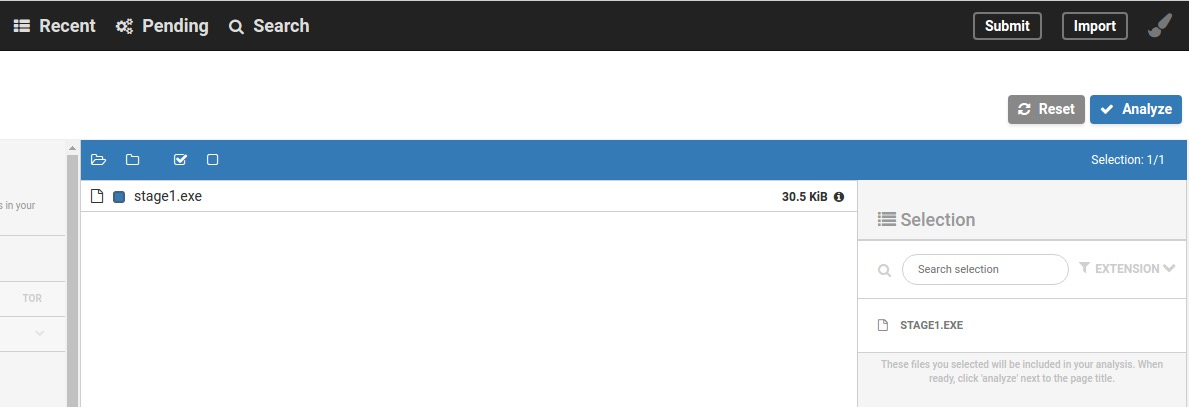
To further understand the malware’s behavior I utilized the Cuckoo Sandbox, an open source automated malware analysis system.
Malware Analysis with Cuckoo
Cuckoo was run on a local web server in ubuntu after executing the program. I uploaded the stage1 malware in the local web server for analysis:
There were two main focuses for Cuckoo:
- Static Analysis:
- API/System Calls
- Behavioral Analysis:
- Trace behaviors in time sequence
Static Analysis
From the Cuckoo analysis, I found that the malware imported three DLL (Dynamic Link Libraries) files: WININET.dll, ADVAPI32.dll, and Kernel32.dll.
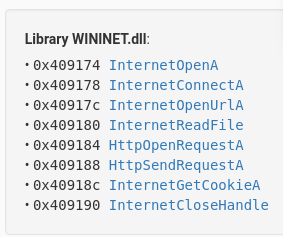 The WININET.dll image shows which protocol the malware is using.
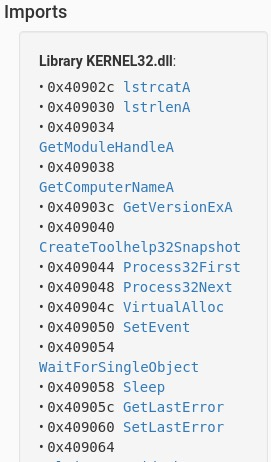 The Kernel32.dll image shows the malware's waiting and sleep signals (WaitForSingleObject and Sleep near the bottom of the image).
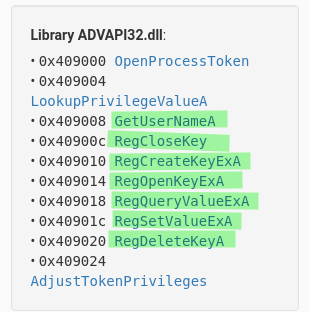 The ADVAPI32.dll image shows if any registry files were touched.
Behavioral Analysis
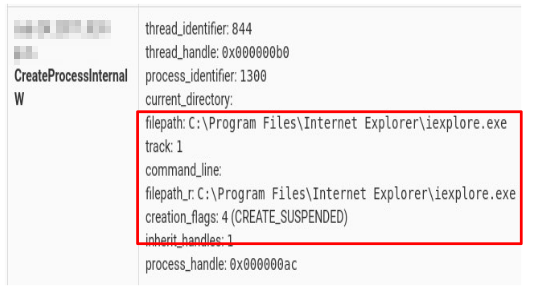
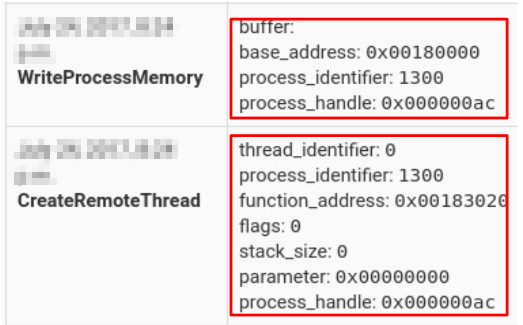
From this Cuckoo analysis, I’m able to trace a behavior in time sequence, which is useful for figuring out cause-and-effect in processes/files/network.
The analysis shows that the malware creates a new file and runs the process, and then writes this new file to memory:
Cuckoo Analysis Results
My analysis of the malware with Cuckoo informed me of the protocol the malware uses to communicate, and that the malware touches a file/registry/process.
The Windows Registry is a core part of Windows, containing a large amount of raw data. Malicious actors commonly create malware that uses native Windows tools to perform its commands, rendering the commands undetectable by signature-based security software. These commands have been found to use registry keys to store and hide next-step code for malware after it has been imported into a system. [Source]
Malware will modify the registry to ensure it can launch itself after a reboot (persistence), to better hide (obfuscation), or to integrate with an existing legitimate process. [Source]
Control Flow Graph (CFG) & Symbolic Execution Analysis
With the information gathered thus far, my next task was to perform a CFG analysis and Symbolic Execution Analysis on the malware.
Control Flow Graph: this is a graphical representation of computation and control flow in a program. The Nodes are basic blocks, with edges representing possible flow of control from the end of one block to the beginning of the other. [Further reading]
CFG Example:In our malware analysis, we are analyzing the CFG at the instruction level.
I was provided a tool that helped in finding command interpretation logic and malicious logic, via a file named score.h. In this file is a list of all of the functions or system calls the malware uses internally. My goal was to provide/update the score of all of the Internet-related functions. A higher score implies that more functions related to the malicious activity are used within the malware.

Once the score.h file was updated, I ran the pre-made python file generate.py with the stage1 malware, which gave me a graphical output displaying all of the functions in the malware:

The image above shows the function entry is at the address 4050C0, and there are three (highlighted) functions within the entry function that have high values. The implication is that the entry function does indeed call some internet related functions.
Symbolic Execution
With the CFG Analysis complete, my next task was to find the correct commands that drives the malware from its entry function down to each of the three highlighted nodes/functions. This will be done with Symbolic Execution (SE). The goal here is to use SE to find inputs, feeding those inputs to trigger malware behavior.
What is Symbolic Execution? Well, rather than executing a program with some random input, SE treats the input data as a symbolic variable, then tries to calculate expressions for the input along the execution. Explained further, SE moves along the path of conditional statements, and combines all conditions until it reaches the target function. At the end, it solves the expression to get an input that satisfies all of the conditions.
Example 1:In the above example, only the conditions for which i=2, j=9 will lead the program to print “Correct!” | Symbolic Execution is available to solve the expression in order to reach the target, in this case “Correct”.
When applying SE to Malware C2 logic, keep in mind that a C2 bot (malware) is expecting inputs (solve the expressions) to trigger behaviors (targets).
Example 2:In the above example, ONLY the commands “launch-attack” and “remove” trigger the functions attack() and destroy_itself(), respectively. Symbolic Execution is able to find the commands that trigger the behavior (taking the guesswork out of the picture, which could be near-impossible to decipher given that C2 malware commands are typically obfuscated).
Finding Commands with Angr
I was fortunate in that this project came with a pre-built symbolic executor and solver, utilizing the SE, angr. This tool was in the form of a python executable file named sym-exec.py, and was executed in the terminal as such:
> python ./sym-exec.py [program_path] [start_address] [end_address]
Note: While Angr is performing the symbolic execution, it stores the current state of the given program into SimState objects. SimState is a structure that contains the program’s memory, register, and other information. SimState provides interaction with memory and registers.
SE was performed on each of the three functions generated from the CFG Analysis, and the results are as follows:


 Having gathered the proper C2 commands [$downloaD; $updatE; $uninstalL], it was time to reconstruct the C2 server to further proceed in the malware's behavior!
Reconstructing the C2 Server
I was given more tools for this task (rendering the seemingly challenging prospect of actually reconstructing a C2 server trivial), in the form of nginx and php scripts. On my part, I simply had to update a text file with the three C2 commands, and the nginx and php scripts would work automatically to push those commands to the malware from ubuntu to windows (simulating a C2 server sending the commands to the malware), which in turn made the malware perform the behavior(s) of those commands.
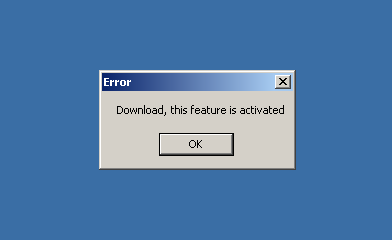
The command $downloaD resulted in this prompt:
The command $updatE resulted in these prompts:


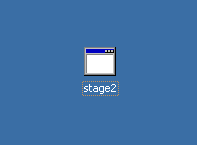
The $updatE command also downloaded the stage2.exe malware!
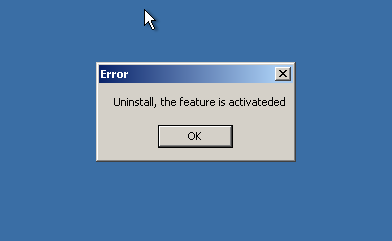
The command $uninstalL resulted in this prompt:
With the download of stage2.exe, Stage 1 of this malware analysis project was complete. Now we move on to Stage 2, which follows the procedures from Stage 1.
Malware Stage 2 - Windows
Stage 2 follows the same exact procedures as Stage 1. Due to this post becoming quite lengthy, I will briefly write about the Stage 2 malware analysis.
- Network Monitoring with Wireshark revealed the Stage2 malware was trying to reach an IP address of 143.215.130.19.
- The ip-tables file was configured to reroute to the above IP address, with the TCP Stream being followed in Wireshark, revealing an HTTP POST request to /users/login.php and a Host that differed from the Stage1 HTTP Host.
- Cuckoo Analysis was very similar to that of the Stage 1 malware, including registry modifications and HTTP usage to get Cookies.
- CFG Analysis resulted in a more complex graph, revealing four Nodes with Internet-related malicious activity functions:
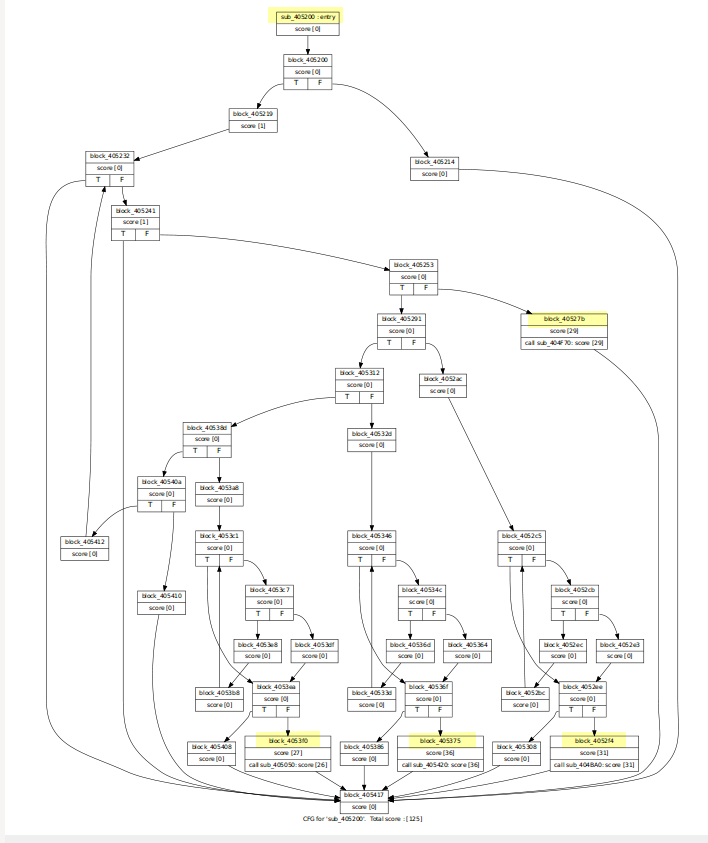
- Symbolic Execution tool was used to identify four C2 commands:


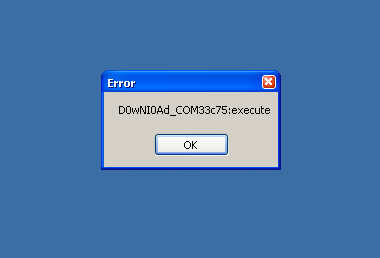
- Text file was updated to execute the above commands while running the Stage2 malware, resulting in these prompts:
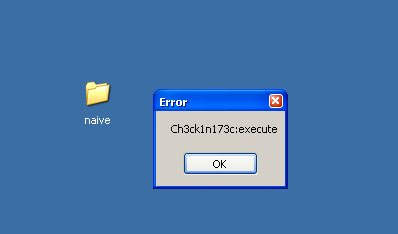

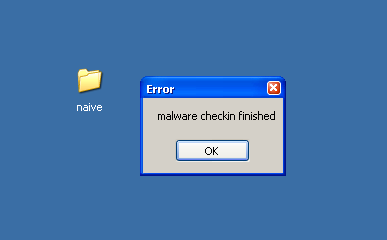
- Note that the Checkin command created a folder named naive on the windows Desktop; this folder is empty.
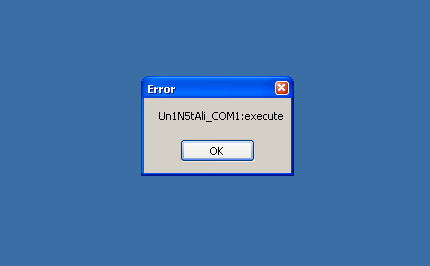

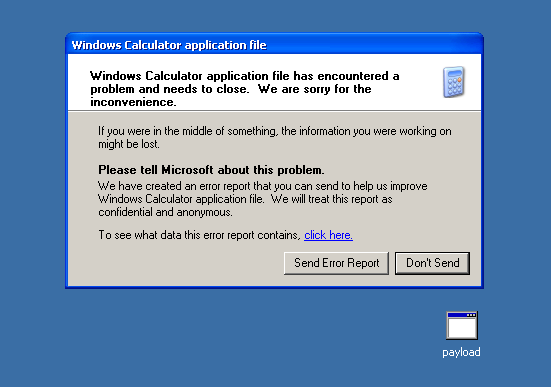
- Note in this last image that the calculator tool encountered a problem! Cuckoo analysis showed that this malware imported the malicious payload file (also shown in the image) as a Windows Registry Calculator application.. sneaky!
- The Stage 2 malware also has a lot more activity than its Stage1 counterpart.
- In the final image above, a file named payload.exe was downloaded. This file is a Linux based malware executable!

- Note that the Checkin command created a folder named naive on the windows Desktop; this folder is empty.
Malware Stage 3 - Linux
This particular malware sample needs to be handeled differently than the Windows malware samples, given that the malware itself is a Linux executable. I was given different tools and methods to analyze this malware.
(Manual) Symbolic Execution
For the SE of the Linux malware, I used the suggested Reverse Engineering program, Radare2. This program provides a set of libraries, tools and plugins to ease reverse engineering tasks. This SE task was vastly different than the Stage 1 and Stage 2 malware samples; the main difference being I had to manually find the addresses and target functions while using Radare2.
The project writeup guided us in the usage of proper commands while using Radare2. Our goal for this task was to find the correct attack vectors (in hex address format) that were real attack functions.
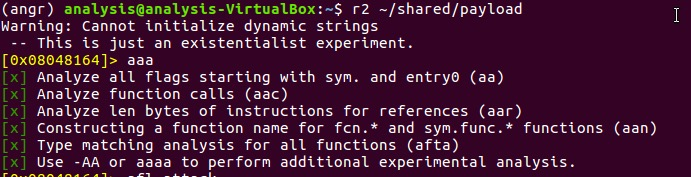
In the image below, Radare2 was executed in the command line, with the Linux payload (malware) as the argument. With this command, Radare2 will now perform symbolic execution analysis on the malware. With the program loaded, I typed the command aaa, which analyzes all functions.
 The afl command was then used to list all functions.
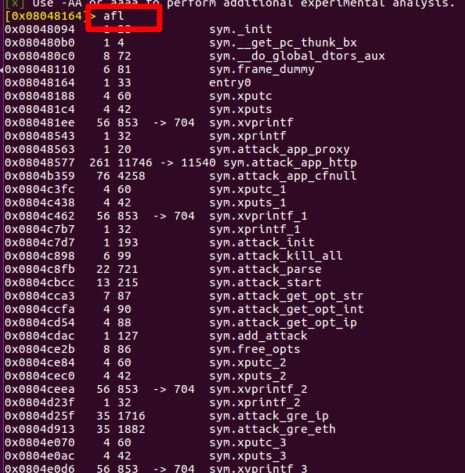 As you can see from the image above, there are a lot of functions that could be analyzed, making this process difficult.
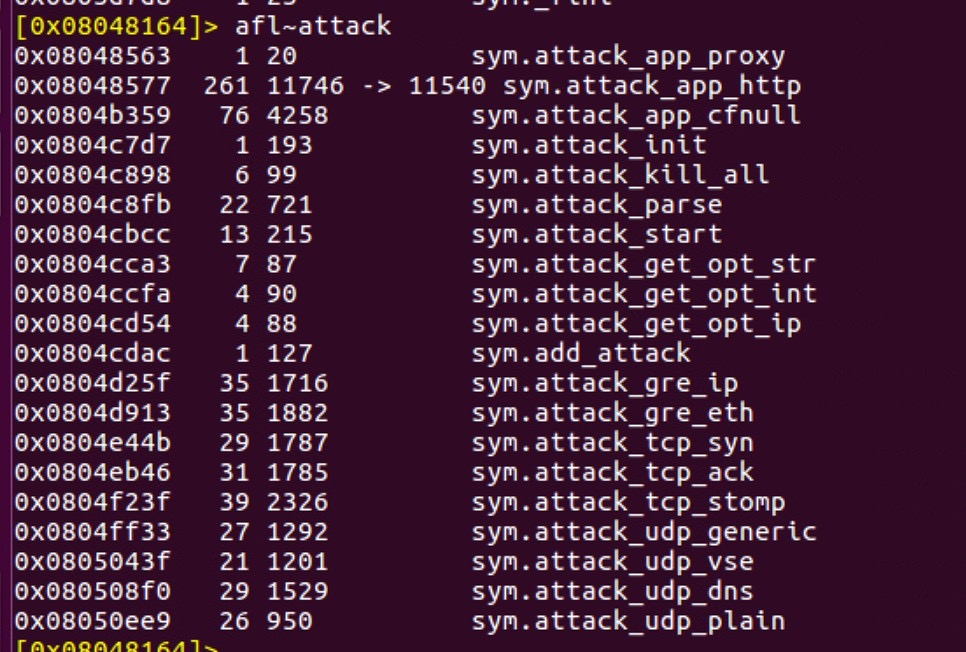
Giving a command of afl~attack will list all of the functions with attack in the name, significantly improving our outputted list to functions that we can reasonably assume are malicious:
Fortunately, Radare2 allows for Linux commands while inside of the r2 console, such as grep.
In the image below, we were given an example for seeing all of the functions having the attack vector afl~send [1] (the two functions are sym.send and sym.sendto). The grep command can then be used on the two functions to show all the attack vectors calling sym.send [2] and sym.sendto [3].

My job was to then iterate through all of the attack functions (from the afl~attack command) and take note of the attack vectors that were actually called [underlined in red below]:
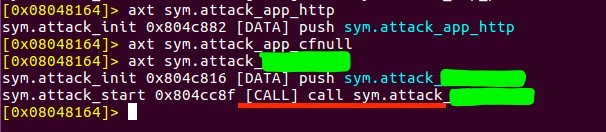 In the example above,
 axt sym.attack_app_http, has only one reference, which is a push instruction. This is not the attack function we’re interested in.
axt sym.attack_app_cfnull has no reference at all; this is also not the attack function we need to explore.
axt sym.attack_??? has a call sym.attack_??? instruction. This is the function we need to explore to determine the target address for the Symbolic Execution.
My task was to find two attack functions, given the rather large list of attack functions available.
Determining the Target Addresses
After many iterations, I found the required attack functions. Now that these functions were found I was able to continue the task of Symbolic Execution to determine the target addresses.
-
I had to step into the attack function using:
s sym.attack_??? -
I then used the following command to determine the instruction address:
pdf | grep sym.send -
This next command was used to point to the instruction:
s address_for_call_sym.send(to) -
Lastly, this next command was used to print two instructions starting with the call sym.send/sym.sendto instruction:
pd 2 -
The above command will output the address of the instruction, which is the successor of call sym.send(to), which is also the target address for the Symbolic Execution:

All of the work above aided in the finding of the proper commands (inputs) that would be used to trigger the malware behavior. As I previously did extensive work on triggering Windows malware behavior, the project writeup did not ask for me to trigger the Linux malware behavior. I simply had to include the correct addresses in my submission file.
Dynamic Analysis of the Linux Malware
Writeup: The malware keeps trying to contact the C2 server. Since this is unsuccessful, I will see the same functions called in a loop. My task is to list the sequence of functions called over and over again that tries to establish a connection. To be able to find the loop, I need to write my own function inside the detect_loop.py file.
- Given Tools for this task:
- instrace.linux.log file: the dynamic instruction trace for the Linux malware. This file was a list of function calls with their address and instruction:

- detect_loop.py: I had to modify the functions in this file to find the loop in the above trace.

- instrace.linux.log file: the dynamic instruction trace for the Linux malware. This file was a list of function calls with their address and instruction:
This part of the project was quite a challenge for me, the most challenging aspect being the modification of the detect_loop.py file.
First, I needed to figure out exactly what was needed of me: In the detect_loop.py file I needed to create an algorithm that compared two lists, creating a third list that contained the common items from those lists (including duplicates). This insight was only known to me by asking one of our class TA’s for help in wrapping my mind around this task.
After some time going through all of the files needed for this task, working out how they work together, and how my code would work in conjunction with all of the files, I was able to continue on.
From the image above, I found that the dynamic_call_sequence function’s arguments, (func_list and trace), were dictionary lists with a large amount of key:value pairs.
- In Python, I created a function that stripped the keys from those two lists, as I only wanted the (address) values from them.
- With this task completed, I then spent time creating the comparison algorithm mentioned earlier, coding it inside of the dynamic_call_sequence function.
- The result was a new list that contained the common items from func_list and trace.
- In the find_loop function I ran the Collections Counter API, which gave me a count of repeated items from the common items list. For my submission to this task, I had to write the addresses of functions that were true malware instructions. [Previous statement intentionally vague]
Linux Malware Conclusion
With that, the Linux malware analysis was completed. Again, this task was difficult for me. Had I not asked the TA’s for help, I’m unsure I would have been able to complete this task. Thank goodness I don’t mind asking for help when I need it! I found it interesting having to manually go through and perform the Symbolic Execution. It was nice for me to not only see the (easy) automatic way, but also the (more difficult) manual way.
Android Malware
This was the final (and most difficult, for me) part of the Malware Analysis project. The writeup included a detailed report on the Android Manifest File (an xml file that provides essential information about your app to the Android system, which the system must have before it can run any of the app’s code). The manifest file names the Java package for the application, describes the components of the application (such as activities, services, broadcast receivers, and content providers), and it declares the permissions that the application must have in order to access protected parts of the API and interact with other applications, in addition to declaring the permissions that others are required to have in order to interact with the app’s components.
In this task, I was given two Android malware samples: the first sample was a malicious APK (Android Application Package) that was found in the wild. The apk was a repackaged version of the CoinPirates game that includes a malicious payload. The writeup explained how to analyze this first malware sample.
The second sample was a malicious apk named sms.apk. My task was to analyze the malware (with no additional guidance) to discover what the malware does. I needed to identify the components that were being used by the app to communicate with its C2 server, identify any anti-analysis techniques used by the app (and remove them if necessary), and finally identify the commands that trigger the malicious behavior.
I used an Android emulator to run both of the malware samples.
The process for analyzing these malware samples:
- Decode app with Apktool
- If needed, modify the dex files with smali, then rebuild and sign the apk.
- Disassemble the dex file into Java source code with JADX
- Search for suspicious behavior
- Identify entry points into the Android App
- Trigger malicious behavior dynamically using the Android emulator console
To distribute apps to Android devices, Android uses the Android Application Package (APK) format. APKs are a zip file containing resources and assembled Java code. If you were to simply unzip the apk, you would only have two files: classes.dex and resources.arsc. Viewing or editing compiled files are next to impossible, meaning the apk file needs to be decoded or disassembled. Reverse engineering tools, such as Apktool, are available should you wish to analyze an app at the bytecode level. Additionally, the app’s Java source code can be partially reconstructed using JADX (which disassembles Dalvik byte code into Java source code, albeit in an imperfect process that will most likely be incomplete, but still useful for doing analysis).
Malware Sample 1: CoinPirates
I first decoded the CoinPirates apk: apktool d CoinPirate.apk
Apktool creates several files and directories once it has completed decoding the apk:

Note: the smali directory contains the original classes found in the classes.dex file. Apktool converts the original classes.dex file into smali using baksmali.
As an example, the source code for an anti-analysis check in this malware is as such:
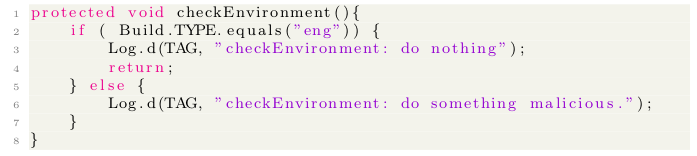
The anti-analysis check is inside of the checkEnvironment method. It checks the model’s build type to see if it is equal to the string “eng”. Since I’m running this malware on an emulator, my Build.TYPE will indeed be “eng”, which causes the malware behavior to not execute.
To outdo the anti-analysis check, I then had to modify the MainActivity.smali (bytecode) file in a text editor:

In the above bytecode:
- The value of Build.TYPE is stored in register v0 on line 7.
- The string constant “eng” is stored in register v1 on line 9.
- The comparison of the strings is completed on line 11, with the result being stored in register v0.
- Line 13: if the value stored in register v0 is equal to zero, then a jump to the cond_0 branch will occur.
- If the Build.TYPE is not “eng” then a jump to cond_0 occurs and the malicious behavior will be triggered.
- To force the control-flow to go to cond_0, I changed the statement on line 15 to “goto :cond_0”, forcing the branch to occur every time the app runs!
With the bytecode modified, I then had to Build and Sign the app, then install it onto the emulator. The “do something malicious” behavior was then executed, meaning I correctly identified and modified the anti-analysis check so that the behavior triggered.
Searching for Suspicious Behavior
With the anti-analysis check out of the way, it was then time to analyze the disassembled source code for suspicious behavior, using JADX.
Defining behavior within Android is challenging. Behavior that may be suspicious or malicious in one app may be expected behavior in another app.. it’s reasonable for a messaging app to access a user’s contacts, but if an utility app such as a flashlight app accesses a user’s contacts it should raise suspicion. The behavior that makes an app potentially malicious is not a particular pattern, but a behavior in an app that is inconsistent with the end user’s expectation.
The easiest starting point for identifying any questionable behavior is by looking at the app’s manifest file, which provides a high-level abstract of an app’s behavior. The highest level of security for Android is the permission system that protects the usage of sensitive behavior.
The manifest file below shows that the CoinPirates app has access to 14 permissions. Malware often abuses the text messaging permissions to communicate with their C2 server and to try and send premium text messages without the user being aware:
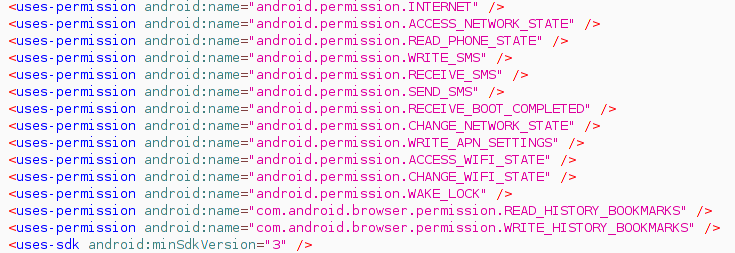
After observing the permissions, my next goal was to vet the app by analyzing how the app uses the sensitive APIs that are protected by the suspicious permissions. Note: since malware writes often repackage their payload within real apps with hundreds of classes, it would be too time-consuming to search through all of the source code. Instead, the writeup had me focus on the entry points of the app.
Identifying Entry Points into an Android Application
Android applications are written using the Java programming language. Unlike conventional Java programs, Android applications do not have a main() function or a single entry point for execution. Instead, they’re designed using components. App components make up the essential building blocks of an Android app. Each component is a different point through which the system can enter a developer’s application. There are four different types of components: activities, services, content providers, and broadcast receivers. Each type of component serves a different role and the set of components used in an Android application define its overall behavior.
Since components are required to be declared in the manifest, this allows me to quickly identify any interesting entry points without having to search through the source code! To avoid detection, malware usually does not trigger until it receives commands from its C2 server. The two most common and efficient wants for this communication is through the network and sms. Since SMS can provide communication when the user does not have a wifi connection, it is usually preferred.
Since the CoinPirates app has declared the RECEIVE_SMS permission, I know that it has the ability to receive broadcasts about arriving text messages through a broadcast receiver. If a broadcast receiver wants to receive a text message, it must specify that it can handle this action by adding the action to its intent filter inside the manifest file as such:

Note the high priority, 10,000. In Android, broadcasts can be ordered or sent to all apps at the same time. In general, apps with a higher priority will receive the priority first. This behavior can be manipulated by malicious apps to hide the notification of received text messages! (As of Android 4.4 this has been slightly adjusted. The default SMS app will always receive the broadcast first, regardless of priority).
I can now use JADX to analyze the source code for the SMSReceiver class to identify any suspicious behavior that may occur when a text message is received. The Android OS notifies broadcast receivers by calling the receiver’s onReceive method. Therefore, I started my analysis from this point in the app. Looking over the source code of the onReceive method, I saw that the method immediately queried a database called “mydb.” The source code also showed me that the values received from the database are being compared to the sender’s number and the contents of the sms body. Based on the results of these comparisons, the app uses the needDel (delete text message) or needUpload variables to control the apps’ control-flow. I was then able to see that this class was being used by the C2 server to trigger malicious behavior. The app uses the “mydb” database to interpret the C2 server commands!
The writeup then proposed I analyze the AlarmReceiver, BootReceiver, and MonitorService components. After looking through those components, I found that the Boot and Alarm Receivers engaged the MonitorService, which then sent out a premium text message to a choice of 8 random phone numbers! This concludes the static analysis portion of the malware. The next section is a short writeup that will be performed on the second malware sample.
Triggering Malicious Behavior Dynamically
With the static analysis complete, I can now identify the necessary events required to trigger malicious behavior in the CoinPirates app. The next goal would be to leverage the details I extracted from the static analysis to dynamically generate the malicious behavior at runtime. In the case that the events necessary to trigger the malicious behavior is dependent on external sources, I can use Android’s provided tools for injecting events into the emulator, via the emulator console.
This is the extent of the writeup for the Android malware samples. My final task was to use all that I learned, analyzing the CoinPirates app, to analyze the sms.apk malware sample.
Malware Sample 2: sms.apk
I will only briefly write about the analysis of this malware, as anything I write for this section has the potential to violate GA Tech’s Honor Code.
The analysis of this malware followed the same procedure as the CoinPirates malware. The difference being that the project writeup did not guide me on how to analyze this malware. I had to utilize what I learned in the CoinPirates writeup to analyze the sms.apk malware.
What I can say is that analyzing this malware sample was incredibly challenging for me! The easy parts were disassembling the sms.apk malware sample and looking through the Java files with JADX. Looking through the Java files, I was able to follow a trail of function and class calls. I spent a while combing through these components, and wasn’t getting anywhere.
I finally had a breakthrough about two weeks in: I felt there was something big that I was missing in my analysis, that I wasn’t seeing. Re-reading the writeup, I found a seemingly minor statement: the values directory has important information. This statement turned out to be the breakthrough I needed! I looked through that particular directory, and lo and behold, I found what I needed!
There was a particular file that contained red herring values, which had me going for a while. Fortunately, I found another file (in the values directory) that was my ticket to completing this task. This file contained name declarators that were identical to the ones in the red herring file, however this file had variables with actual data in them, the data needed to answer the questions for this project!
The data within the file in the values directory was used to trigger the malicious behavior! Using the emulator console I sent a text message from a particular number, with the body of the message being a specific string. The result was the malicious behavior being “triggered”; the trigger was a reply being sent to the emulated Android device, with a seemingly random sms body, which was then used as my answers to the project questions.
Conclusion
This project was incredibly challenging at times, with each main task becoming increasingly difficult. Besides learning the technical aspects of malware analysis, I also learned to take much needed mental breaks when I found myself getting nowhere. For the sms.apk malware analysis I would work on it for a week, take a week off, then come back to it another week. I believe it’s a detriment to the overall work and our mental health to be working at high stress levels.
Thank you for reading this post; I hope you learned something new!